


News Categories
Changzhou Dongjia Decorative Materials Co., Ltd.
 sales@dongjiacn.com
  13775293290
  Search
Installation Instruction in English.jpg
Installation Instruction in Russian.jpg
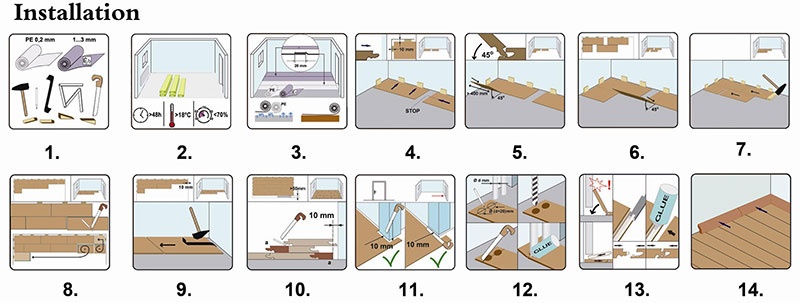
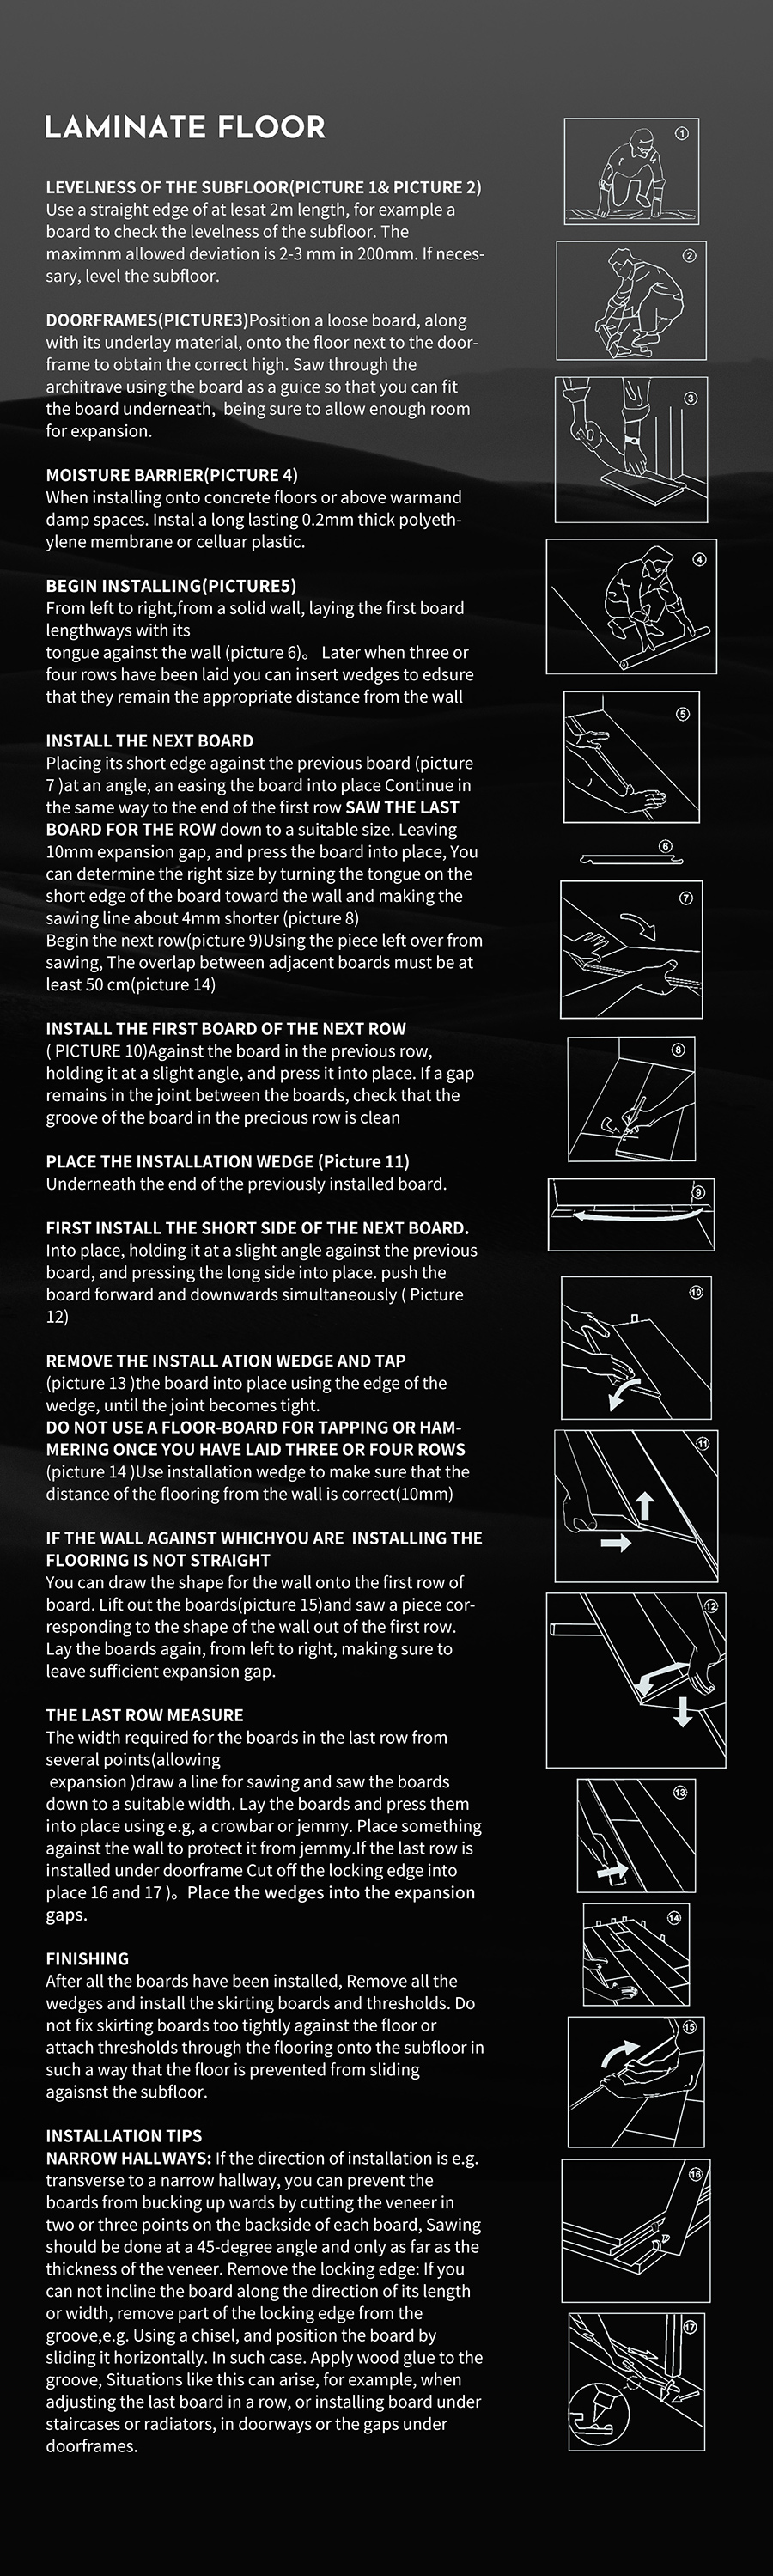
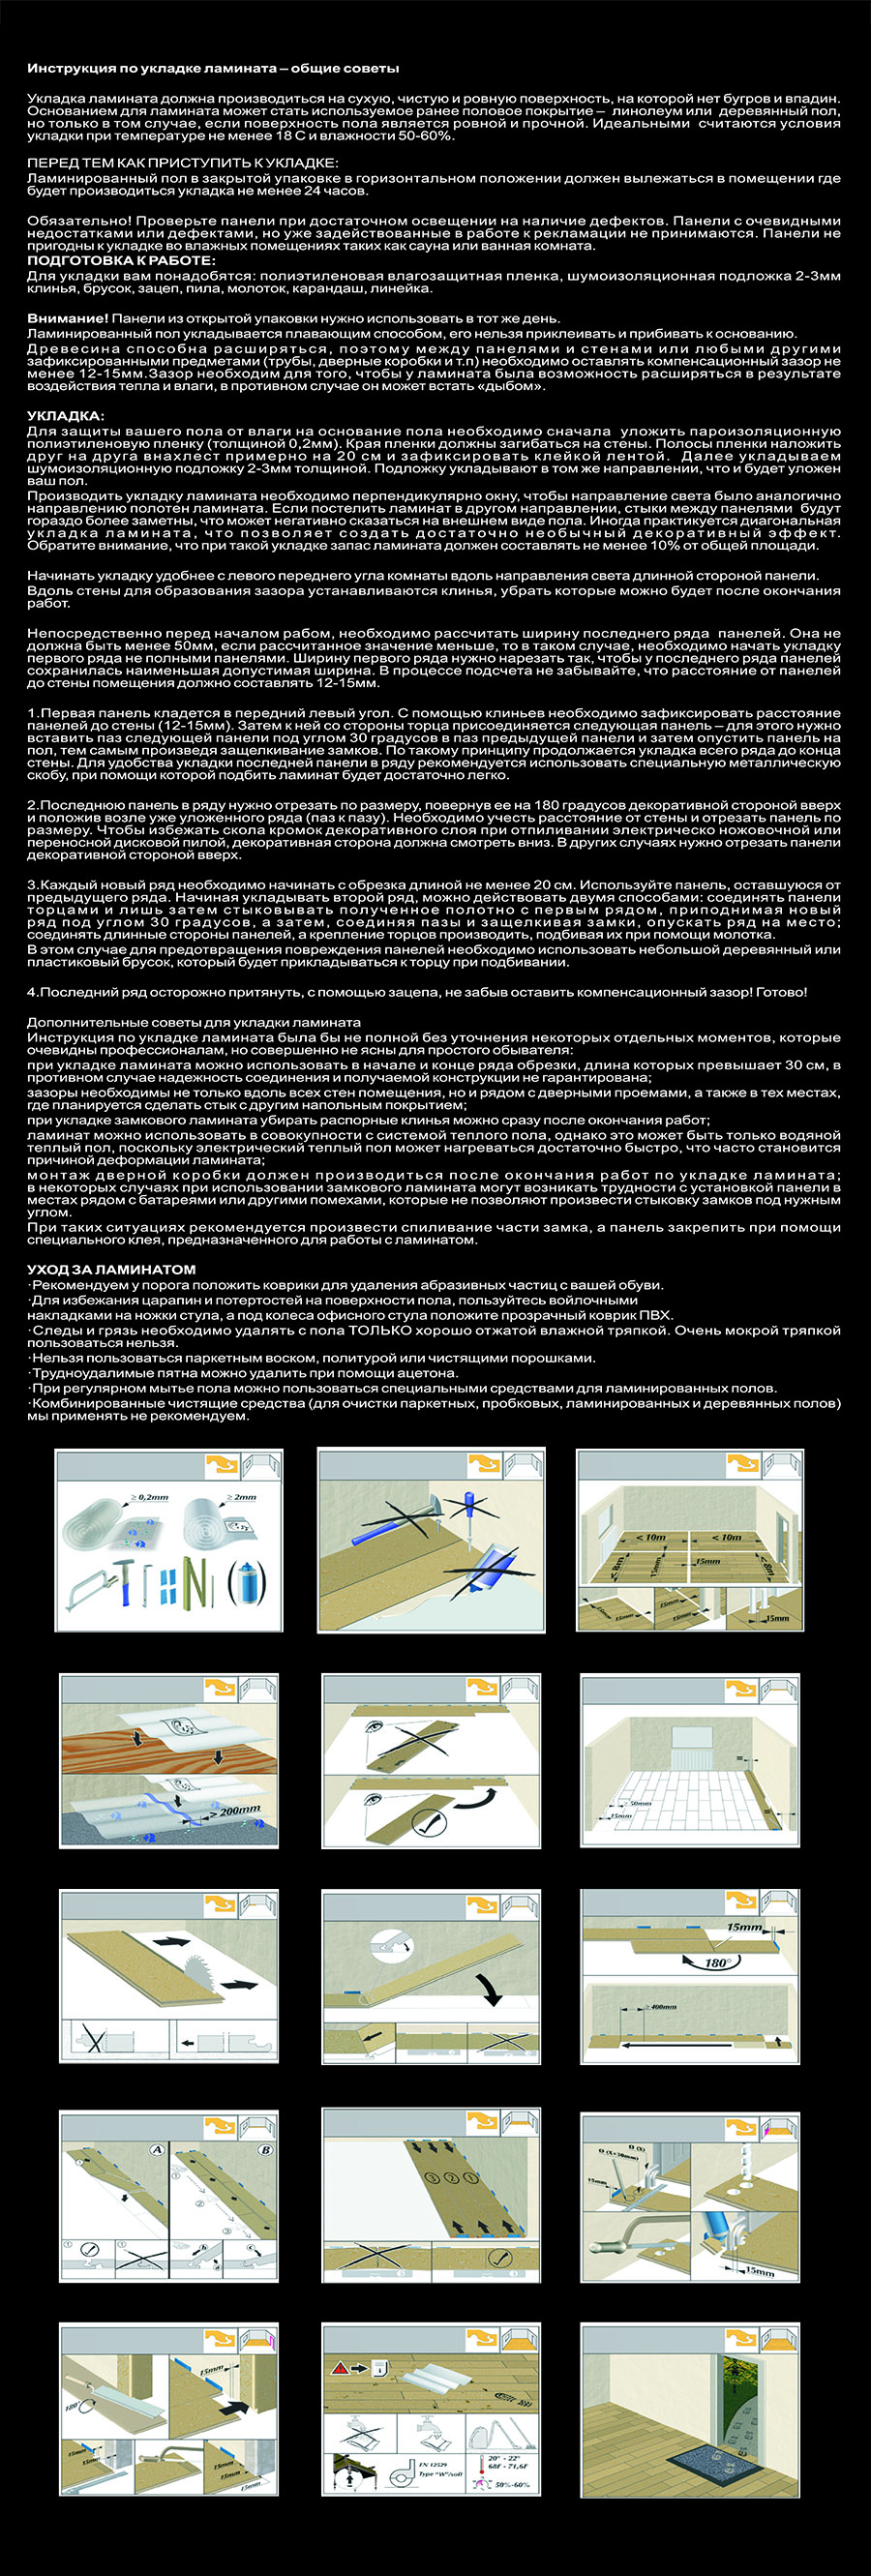
IMPORTANT:
• Laminate flooring is installed using a patented glueless locking mechanism.Because this is a floating floor system, It should not be nailed or glued to the subfloor.
• The floor should not be installed directly against any fixed,vertical object (including walls,staircases,fixtures,etc.); Allow a minimum of 5/16 in (8mm) exparision space around the perimeter of the room and any fixed objects such as posts. Use spacers included in a laminate flooring kit to achieve uniform space around fixed objects.
• Rooms measuring wider or longer than 30ft(9m) require the use of T-moldings to allow for normal expansion and contraction of the floor.
• Be sure to stagger boards by a minimum of 12 in (300mm).
• Laminate flooring should not be installed in wet areas or rooms where the relative humidity exceeds 70%.
Materials and Tools:
• Laminate installation kit (including spacers, tapping block, pull bar)
• Hammer
• Table or hand saw
• Carbide-tipped circular saw blades
• Vacuum
• Tape measure
• Duct tape
• Age-resistant,non-permeable polyethylene vapor barrier(0.008 in or 0.20mm) for installation over concrete
• Laminate underlayment
• Safety glasses
• Gloves
Step:
1. Thoroughly clean the subfloor so that there is no debris on the floor and that it is flat and smooth.
2. Directly onto the subfloor, lay down a layer of plastic sheeting to create a moisture barrier. Tape the sheeting 2 inches above the floor using painters blue masking tape. If needed, use duct tape to overlap the edges of the plastic sheeting. Overlap the plastic sheeting by 6 inches.
3. Use small sections of planks as spacers to hold the flooring away from the wall about one quarter inch. The spacers help allow for expansion around the perimeter of the floor. Place the first row snug against the spacers. Trim the last row to length to fit so that it ends a quarter-inch from the wall.
4. Use the short trimmed section of the previous row to start the next row. This will ensure the joints between planks in a row are staggered from the joints in adjoining rows.
The laminated flooring in this project has a soundproof backing and textured cherry wood finish. It snaps together by lining up the planks at an angle and then flattening out the row being installed.
To save the edges of the flooring boards, use a piece of scrap wood to tap adjoining rows together. This will prevent damage to the tongue or groove with the hammer.
5. When installing the next plank in the row, lift the plank at an angle to allow it to set/lock in place and tap the plank against the previous plank in the row with a hammer and tapping tool. Continue across the room until reaching the far side. Rip planks lengthwise to fit in the last row and install transition strips between the flooring and other floor types at the doorways.
6. Remove the spacers around the border and install baseboards and quarter round covering the plastic moisture barrier on the wall and the gap between the wall and the flooring. Set nail heads slightly below the surface of the molding and fill with wood putty. Use touch up paint to cover the wood putty.

Changzhou Dongjia Decorative Materials Co Ltd. Professional Manufacturer Of Laminate floor&SPC floor. Exports To More Than 30 Countries AroundThe World.
E-mail: sales@dongjiacn.com
Add: South of Industrial Zone, Cuiqiao, Henglin Town, Changzhou, Jiangsu, China
WhatsApp: +86-13775293290


View More(Total0)Comment lists